![TD-Logos-06.png]](https://knowledge.techdefenders.com/hs-fs/hubfs/TD-Logos-06.png?height=48&name=TD-Logos-06.png)
You will need to 1 - Create the Repair and 2 - Generate a Shipping Label
CREATE THE REPAIR
Login to www.repairWATCH.com.If you need a login, please reach out to support@techdefenders.com.
Locate the device you want to send in for repair. You can do this by locating the device profile, in one of these ways:
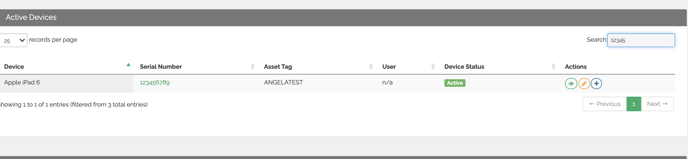
- click on 'view devices', and search by serial number or asset tag and then click on the eye icon
- click on users and search the student/faculty name that is assigned to the device, once in the profile, you will see the device/s attached to that user. Click on the serial number to access the device profile.
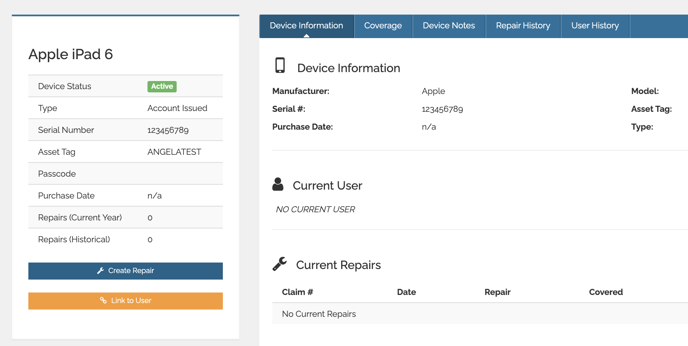
Create a repair - click the blue ‘Create Repair’ box, select the repair type, any notes you’d like the technician to see. Once filled out, click the green ‘Create Repair’ button.
If you have multiple repairs to send in at once, create those repairs as well. Every time a repair is submitted, it gets added to a shipment queue.
GENERATE SHIPPING LABEL
When you are ready to ship the repair/s. Click on the truck icon that says ‘Batch Shipments’. You should see two sections:
1 - Repair Orders Pending Shipment
2 - All Shipments.
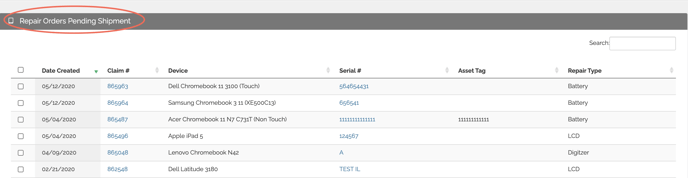
The repairs that you just created will be sitting under the section ‘Repair Orders Pending Shipment’. Click on all the repairs that will be going in one box.
Click here for a shipping guide that will tell you how many devices should go in which box.
Once you have all the devices selected that will go in one box, click the orange button ‘create batch shipment’.
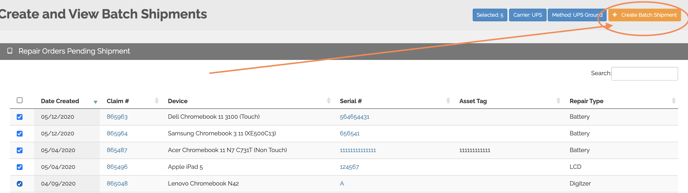
This will batch the repairs and take you to a new screen with the shipment profile. Here you can print your packing list (that will go in the box) and your shipping label.
You're all set! Simply box the devices up carefully, add the packing list to the inside of the box, and tape the shipping label to the outside of the box and ship out. If you need a pickup scheduled, or have any other questions at all, please contact us at support@techdefenders.com